 throughout the system. Mini-Logs are not stored in the Zetta Content Stores. A Mini-Log can be dragged and dropped into a Log, Clock, Recorder Log or Recorder Clock. Mini-Logs are not stored in GSelector® when using GSelector Integration.
Welcome < Modules < Library Module < Mini-Logs
The Mini-Logs tab displays a list of Mini-Log assets. A Mini Log is a user-built piece of schedule similar to a log that is created outside the log. A Mini-Log can be any combination of assets or events similar to an Event Log or Show. Unlike Shows, Mini-logs are flattened into the Station Log the moment it is inserted via one of the following means:
Mini-Logs can cover a Single Hour in a day, Multiple Hours in a day or Multiple Hours spanning days. The Log Handling on Mini-Log placement drop-down, in the Logs Settings tab of the Station Configuration, is used to select how Zetta will handle existing events in the log when a Mini-Log is placed into a Log. Mini-Logs are Global assets therefore they are not station specific and can be add to a log for any station. Mini-Logs in the Zetta® are denoted by a colored pie icon throughout the system. Mini-Logs are not stored in the Zetta Content Stores. A Mini-Log can be dragged and dropped into a Log, Clock, Recorder Log or Recorder Clock. Mini-Logs are not stored in GSelector® when using GSelector Integration.
|
Important Note! |
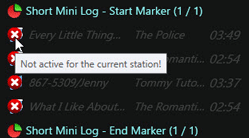
The Log(s) must be generated for all the days that a Mini-Log will span prior to adding the Mini-Log. Zetta will not allow a Mini-Log to span to a day's log that has not been previously generated. If a Mini-Log is dropped into a station where the assets in the Mini-Log are not active for the station, the assets will show an alert in the log and the inactive events will not play.
|
The Mini-Log Metadata Card is opened when double-clicking on a Mini-Log in the Mini-Logs tab of the Library Module. A Mini-Log asset can also be access from the Clocks module by double-clicking the Mini-Log. The Mini-Log Metadata Card holds information about the asset and an Events pane, which can be used add, skip or remove an event from the Mini-Log. The Mini-Log metadata card can be arranged by changing the docking of the sections of the window, see the Docking and Undocking section of this guide for more details on docking. An Asset can be auditioned from the Mini-Log by simply middle-clicking the desired asset, clicking the Audition button in the events toolbar or by clicking a desired play action or play position from the right-click menu.
Click any area in this image for help

Click any area in this image for help
In this Topic: show/hideshow/hide
The Mini-Log Metadata Card has two toolbars the Main Toolbar and the Mini-Log Events Toolbar. The Mini-Log is saved as changes are made so there is no Save button needed.
|
|
Refresh - The Refresh button will refresh the data displayed in the selected metadata card. This can be used to pull any data changes that may have occurred on another computer while the metadata card is open. |
|
|
Copy - The Copy option will create a duplicate of the asset with the exception of the Mini-Log Name and External ID. |
|
|
Publish - The Publish button uses the Publish Configurations to Publish the selected content of the Mini-Log. The publish button can be used to preview the content of the Mini-Log in the Multitrack Viewer. Simply select all or some of the content of the Mini-Log, select the publish button and finally select the Multitrack Viewer tab at the bottom the publish window. Since a Mini-Log is not station specific asset, the normalization used for the Mini-Log content is set using the Normalization targets for Show / Mini-Log Publish from Library option in the Publish Configuration window. |

In the Mini-Log Metadata Card the Primary pane is used to add specific Mini-Log information about the asset using the following fields:
Mini-Log Name – The Mini-Log Name field is used to give the Mini-Log a name or title that can be referenced in other places in the application.
External ID - The External ID displays an external alpha-numeric identification used for the asset by an external source. An External ID is a unique string; the user will be prompt when a duplicate External ID is entered. If this field contains a predefined value then Zetta is automatically generating a unique ID. See the External ID topic in the System Configuration section for more information.
Duration – The Duration field will display the amount of time the asset will take to play from Trim In of the first event to Trim Out of the last event.
Runtime - The Runtime field will display the amount of time the asset will take to play from Trim In of the first event to Segue of the last event.
|
|
Audition – The Audition button will allow the user to listen to a selected piece of audio locally without it going over the air. Using the arrow drop-down, the user can select the play action or the marking point of the audio to start playing based on the preferences specified in the Auditioning tab of the Preferences Configuration window. An Audition Stream Group and stream must be defined and an audio event must be selected. Optionally, simply middle-click the title of the asset and the asset will be auditioned based on the default marking point (shown on the button). If the default marker is not set for the selected asset the audio will start from the Opening. To stop the play of the audio simply middle-click the same asset or click the Audition button again. See the Audition Options section of this topic and the Audition Module topic of this guide for more information on auditioning assets. |
|
|
Segue Editor® – When pressed, Zetta will launch the Segue Editor. The Segue Editor will allow the user to auto post, set trim, segue and volume points for the selected Mini-Log events. For more information about the Segue Editor, see the Segue Editor section of this guide. |
|
|
Voice Tracker® – When pressed, the Voice Tracker will open for the selected event in the Mini-Log. This editor allows users to record voice tracks and set segues for the voice track, the previous event and the next event. The editor opens showing three tracks, the first being the event the user selected before opening the editor, the middle being the Voice Track and the third being the next event. When a Voice Track is created it uses the Voice Track (Shows / Mini-Logs) setting to name the Voice Track. The Voice Track is then activated on the default station allowing it to be played on any station. For more information about the Voice Tracker, see the Voice Tracker section of this guide. |
|
|
Publish Selected Log through Site Replication - The Publish Selected Log through Site Replication button is used to publish the Mini-Log to the configured site replication servers. This button is only visible when Site Replication is configured. When the mini-log is not in sync the user will see a Not Synced |
The Mini-Log Events pane is similar to the Logs module. The Mini-Log Events List allows the user to quickly view information and make modifications to the Mini-Log. The default Mini-Log event list has the following columns. Additional columns can be added by right-clicking the column header and removing, inserting or replacing the column. The [+] and [-] controls are used to expand and contract Spot Blocks, Shows and Macros. Optionally, double-click the event to expand or contract the contents of these events.
Airtime - The Airtime column shows the estimated airtime of the event as if it were placed in the log at 12:00am. This airtime is recalculated based on where the Mini-Log is placed in the Log and when the Mini-Log is executed by the sequencer.
Event - The Event column shows the title or name of the event and an icon signifying the type of media event that is scheduled to play. When the event is played in the Logs Module the play progress of each event is displayed the same as any other event in the log.
Chain Type - The Chain Type column shows the action that is to be performed when the current event ends. The Segue chain type is available for all audio events. The Auto Post and Link-Song chain types are available for Links, Voice Tracks, Quick Recordings, Custom Assets and External Log events. The Chain Type can be changed in the Mini-Log or log by clicking on the chain type icon for the scheduled event.
Skip - The Skip column shows if the event was or will be skipped. The event is also shadowed in gray by default. To delete an event from the Mini-Log, highlight the event and press Delete to remove the event. The user will be prompt to confirm the deletion. If an event is skipped in the Mini-Log it will show as skipped when dropped into a station Log.
The following assets can be added to the Mini-Log Events pane by dragging and dropping them from any module:
|
Important Note! |
A Mini-Log cannot be placed inside another Mini-Log. |
Using the mouse to right-click the Mini-Log Events pane will display a menu of additional options.

The Audition options are typically in the first two sections of the right-click context menu. These audition options are configured in the Context Menu Customization section of the Auditioning tab in the Preferences Configuration window. The audition section of this menu is used to play the audio on an audition play stream. The default options in this menu are Audition, Go To Start, Stop, Play-Pause, Opening, Segue and Closing. The top options are used for playback of the audio and the bottom options are used to select the marking point at which the audio will play. Clicking a marking point from the menu will play the audio from the point selected. The By Default Audition from option is the checked option in the list of marking points. This means when the Audition button in the toolbar is clicked, the default action is to audition the asset from this checked marking point. If the default marker is not set for the selected asset the audio will start from the Opening. This default action can be changed temporarily by right-clicking on the context menu option that is to be set as default. This will change the default for ALL of the Audition context menus in Zetta for this users Zetta session. Optionally, the user can simply middle-click the title of the asset to be auditioned and the asset will be auditioned based on the default marking point. See the Audition Module section of the guide for more information on auditioning assets.
The Delete Event option will delete the selected events from the Mini-Log Metadata Card. If the Mini-Log is scheduled but is not yet being played by the sequencer, the change will NOT be reflected in the Log. This change will need to be done in the Log.
The same Control Events that can be added to a Log can also be added to a Mini-Log by right-clicking in the Mini-Log events pane and selecting Insert Control Event. In addition, an Hour Marker can also be added to a Mini-Log to mark the change in hours. When the Mini-Log is dropped into a Log the Hour Markers are matched up with the Top of Hour markers in the Log. If the Mini-Log has no TOH Markers, it gets flattened into the Log at the very position where it was inserted. If the Mini-Log has one or more Hour Markers then the Events in Mini-Log prior to the first Hour Marker (if any) get flattened at the very position where the Mini-Log was inserted. The existing events in the SAME hour that are below the insertion position are treated as per the Log Handling on Mini-Log placement setting for the station. The events that follow the Hour Marker get flattened and inserted right after the NEXT Top of Hour in Log and the existing log events already present in the hour (if any) are treated per the Log Handling on Mini-Log placement setting.
To Juggle events simply right-click an event in the Mini-Log Event list, click Juggle from the menu, then right-click a second event in the Mini-Log event list and click juggle again. The two events will switch positions.
The Edit audio option is used to choose an available audio editor, the user can select the Zetta Multitrack Editor or the Zetta Editor (Quick Record module). See the External Editors section of this guide for more details on adding editors.
The Properties option will open the properties window for the selected asset or control event.
|
|
To add a new Mini-Log asset to the Library Module in Zetta, perform the following steps: |
 button.
|
|
To copy a Mini-Log asset to the Library Module in Zetta, perform the following steps: |
 button.
Welcome < Modules < Library Module < Mini-Logs
© 2007-2024 RCS. All Rights Reserved.


 button that can be clicked to sync the sites.