|
Execute Command
|
Parameters
|
Description
|
Comment
|
|
MultiTrack.AutoScrub
|
Step (seconds)
|
AutoScrub will step the play marker by the specified number of seconds forward or back continually depending on the device used for the mapping. If Auto Scrubbing is started while stuttering is in progress, the play marker will jump seek to the next offset, stutter at that position for the seek interval, then jump again, stutter at the next position for the seek interval and so on. This will continue till the end or beginning of the audio is reached or is stopped (either by moving the scrub wheel to the center position or by using stop command). If the scrubbing wheel, of the device, is moved back to the center position while seeking, seeking will stop and regular stutter will continue in a loop in the current seek position. Stopping will stop both scrubbing and stuttering.
|
This command is designed to be used with a Jog/Shuttle wheel such as one of the JL Cooper devices supported in Zetta. GPI, Cue Point or Keyboard
|
|
MultiTrack.Command.Copy
|
|
This option will copy the selected section or highlighted selection of audio to the clipboard for pasting.
|
This audio can be pasted to the same track, another track or to another project. GPI or Keyboard
|
|
MultiTrack.Command.Cut
|
|
This option will cut the selected section or highlighted selection of audio from the track. It will be temporarily placed in the clipboard for pasting.
|
This audio can be pasted to the same track, another track or to another project. GPI or Keyboard
|
|
MultiTrack.Command.Delete
|
|
This option will remove the selected section or highlighted selection of audio. When this option is used to delete a highlighted selection of audio, two new pieces of audio will be created out of the remaining audio, if the highlighted selection was not at the beginning or end of the audio track.
|
This audio will not be held in the clipboard or be available for pasting. GPI or Keyboard
|
|
MultiTrack.Command.Paste
|
|
This option will paste any audio found in the clipboard from a Copy or Cut operation.
|
This audio can be pasted to the same track, another track or to another project. GPI or Keyboard
|
|
MultiTrack.Command.Redo
|
|
This option will redo the previous undone change.
|
GPI or Keyboard
|
|
MultiTrack.Command.Split
|
|
This option will split the selected section or highlighted region of audio.
|
GPI or Keyboard
|
|
MultiTrack.Command.Undo
|
|
This option will undo the previous change.
|
GPI or Keyboard
|
|
MultiTrack.FastForward
|
|
Fast Forward will fast-forward the play marker five
seconds in the audio each time it is used.
|
GPI or Keyboard
|
|
MultiTrack.GoTo.End
|
|
This option will place the play marker at the end of the audio that is farthest to the right.
|
GPI or Keyboard
|
|
MultiTrack.GoTo.Start
|
|
This option will place the play marker at position 0.
|
GPI or Keyboard
|
|
MultiTrack.JumpToSelectionEnd
|
|
This option will jump the play marker to the End of the highlighted selection.
|
GPI or Keyboard
|
|
MultiTrack.JumpToSelectionStart
|
|
This option will jump the play marker to the start of the highlighted selection.
|
GPI or Keyboard
|
|
MultiTrack.MarkLeft
|
|
This option will mark the start of a selection
|
GPI or Keyboard
|
|
MultiTrack.MarkRight
|
|
This option will mark the end of a selection
|
GPI or Keyboard
|
|
MultiTrack.MixAndSave
|
|
This option will look for a highlighted region, if a highlighted region exists; it will mix the selected portion of the non-muted tracks and save the audio file using the filename defined in the Quick Record section of the Voice Track and Quick Record tab of the System Configuration window. If there is not a highlighted region all non-muted sections of the tracks will be mixed and saved to a Quick Record asset using the filename defined in the Quick Record section of the Voice Track and Quick Record tab of the System Configuration window.
|
Mix will first look for muted tracks; these muted tracks will not be included in the mix. GPI or Keyboard
|
|
MultiTrack.MixAndSaveAs
|
|
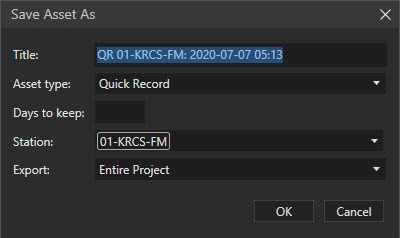
This option will open a Mix and Save As window allowing the user to define the Title, Asset Type, Days to Keep, Active Station and the Selection Type to save.
|
Mix will first look for muted tracks; these muted tracks will not be included in the mix. GPI or Keyboard
|
|
MultiTrack.MixToFile
|
|
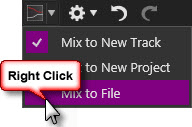
This option will look for a highlighted region, if a highlighted region exists; it will mix the selected portion of the non-muted tracks to an empty or new track. If there is not a highlighted region all non-muted sections of the tracks will be mixed to an empty or new track.
|
Mix will first look for muted tracks; these muted tracks will not be included in the mix. GPI or Keyboard
|
|
MultiTrack.MixToNewProject
|
|
This option will look for a highlighted region, if a highlighted region exists; it will mix the selected portion of the non-muted tracks to the first track in a New Project tab. If there is not a highlighted region all non-muted sections of the tracks will be mixed to the first track in a New Project tab.
|
Mix will first look for muted tracks; these muted tracks will not be included in the mix. GPI or Keyboard
|
|
MultiTrack.MixToNewTrack
|
|
This option will look for a highlighted region, if a highlighted region exists, it will mix the selected portion of the non-muted tracks and open a Windows Save As browse window allowing the user to select a location and enter a file name for the audio file. If there is not a highlighted region all non-muted sections of the tracks will be mixed and a Windows Save As browse window will open allowing the user to select a location and enter a file name for the audio file.
|
Mix will first look for muted tracks; these muted tracks will not be included in the mix. GPI or Keyboard
|
|
Multitrack.InsertCopiedSelectionMerge
|
|
The Insert Copied Section/Merge option is used to insert and merge a copied highlighted region into the audio section.
|
GPI or Keyboard
|
|
MultiTrack.PanLeft
|
|
This option will move the zoom/pan control to the left equal to the amount of the Zoomed position.
|
GPI or Keyboard
|
|
MultiTrack.PanRight
|
|
This option will move the zoom/pan control to the right equal to the amount of the Zoomed position.
|
GPI or Keyboard
|
|
MultiTrack.Pause
|
|
This option will pause any playing audio and hold the play position.
|
GPI or Keyboard
|
|
MultiTrack.Play
|
|
This option will start playing the non-muted tracks from the play marker position.
|
GPI or Keyboard
|
|
MultiTrack.PlayExcludingSelection
|
|
This option will play the audio of all non-muted tracks except for any highlighted regions
|
GPI or Keyboard
|
|
MultiTrack.PlayFromBeginning
|
|
This option will start playing the audio from position 0. All non-muted tracks will play.
|
GPI or Keyboard
|
|
MultiTrack.PlayOutsideSelection
|
|
This option will play 2 seconds of audio on each side of the highlighted region for all non-muted tracks.
|
GPI or Keyboard
|
|
MultiTrack.PlaySelection
|
|
This option will play the audio within the highlighted region area of all non-muted tracks.
|
GPI or Keyboard
|
|
MultiTrack.ProjectClose
|
|
This option will close the current project.
|
The user will be prompted to save the project if there are any unsaved changes. GPI or Keyboard
|
|
MultiTrack.ProjectNew
|
|
This option will open a new project tab.
|
GPI or Keyboard
|
|
MultiTrack.ProjectOpen
|
|
This option will open a browse window allowing the user to select an existing project file.
|
GPI or Keyboard
|
|
MultiTrack.ProjectSave
|
|
This option will save any changes to the existing project.
|
If the project is new the user will be prompted to name the project, choose a file path to save the project and choose whether to save copies of the associated audio files. GPI or Keyboard
|
|
MultiTrack.ProjectSaveAs
|
|
This option will open the Save Project As window allowing the user to name the project, choose a file path to save the project and choose whether to save copies of the associated audio files.
|
GPI or Keyboard
|
|
MultiTrack.Record
|
|
This command option will start recording at the play cursor position on the tracks that are armed for recording.
|
Use the Track.ToggleRecord to arm the selected tracks for recording. GPI or Keyboard
|
|
MultiTrack.Rewind
|
|
This will rewind the audio (move the play marker to the left) by 5 seconds each time it is used.
|
GPI or Keyboard
|
|
MultiTrack.Scrub
|
Step seconds
|
Scrub will step the play marker by the specified number of seconds forward or back depending on the device used for the mapping. If Scrubbing is started while stuttering is in progress, the play marker will jump seek to the next offset, stutter at that position for the seek interval, then jump again, stutter at the next position for the seek interval and so on. This will continue till the end or beginning of the audio is reached or is stopped (either by moving the scrub wheel to the center position or by the stop command). If the scrubbing wheel, of the device, is moved back to the center position while seeking, seeking will stop and regular stutter will continue in a loop in the current seek position. Stopping will stop both scrubbing and stuttering.
|
This command is meant to be used with a Jog/Shuttle wheel such as one of the JL Cooper devices supported in Zetta. GPI
|
|
MultiTrack.Selection.Cancel
|
|
This option will cancel any highlighted selection.
|
GPI or Keyboard
|
|
MultiTrack.Selection.Extend
|
|
This option will extend the highlighted selection range.
|
GPI or Keyboard
|
|
MultiTrack.ShowAll
|
|
This option will Zoom out the tracks to show all the audio sections in the project tracks.
|
GPI or Keyboard
|
|
MultiTrack.SnapDelete
|
|
This option will remove the highlighted section of audio and snap together the remaining surrounding audio.
|
GPI or Keyboard
|
|
MultiTrack.SnapDeleteMerge
|
|
This option will remove the highlighted section of audio and snap together the remaining surrounding audio and merge the sections into one.
|
GPI, Cue Point or Keyboard
|
|
MultiTrack.SnapInsert
|
|
This option will paste the audio, previously copied or cut into the windows clipboard, into the selected audio at the play marker, thus splitting the selected audio into two separate sections. When the insert is complete there will be three separate audio sections that are snapped together.
|
GPI or Keyboard
|
|
MultiTrack.SnapRecord
|
|
This command option will record the audio into the selected audio at the play cursor position, thus splitting the selected audio into two separate sections. When stop is hit there will be three separate audio sections that are snapped together. A track must be armed for this command to work.
|
GPI or Keyboard
|
|
MultiTrack.Stop
|
|
This option will stop the command currently in process and return the play marker back to its original position.
|
GPI or Keyboard
|
|
MultiTrack.StutterPlay
|
step: seconds
|
This option will stutter play the audio, this option is used for fine-tuning to a precise position within the audio. StutterPlay will start playing from the play marker for the specified seconds and then go back to the starting point and play the same number of seconds continuously in a loop until switched to a different play command or stopped by the user. If Stuttering is started while scrubbing is in progress, scrubbing will stop and regular stuttering will start at the current position.
|
This command is meant to be used with a Jog/Shuttle wheel such as one of the JL Cooper devices supported in Zetta. GPI
|
|
MultiTrack.ToggleAudio
|
|
This option will show/hide the Audio List.
|
GPI or Keyboard
|
|
MultiTrack.ToggleHistory
|
|
This option will show/hide the History pane
|
GPI or Keyboard
|
|
MultiTrack.Track.JumpTo
|
Value:
|
This option can be used to jump between projects by the specified value in the settings field.
|
GPI or Keyboard
|
|
MultiTrack.Track.Next
|
|
This option will move the user to the next track down from the selected track until the bottom track is reached.
|
GPI or Keyboard
|
|
MultiTrack.Track.Previous
|
|
This option will move the user to the previous track up from the selected track until the top track is reached.
|
GPI or Keyboard
|
|
MultiTrack.Track.ToggleMute
|
|
This will toggle the mute button for the selected track. Multiple tracks can be muted.
|
GPI or Keyboard
|
|
MultiTrack.Track.ToggleRecord
|
|
This command option will toggle the Arm Track button for the selected track. Tracks with the Armed button active will record when the play controls record button is selected. All tracks can be selected to record simultaneously as long as each track is armed and each track has a separate record device selected.
|
Track must be selected for the command to Arm the track. GPI or Keyboard
|
|
MultiTrack.Track.ToggleSolo
|
|
This will toggle the solo button for the selected track. All other tracks will be muted and show only the current track as an enabled track. When the track is selected as Solo the button will change to a yellow color.
|
GPI or Keyboard
|
|
MultiTrack.ZoomIn
|
|
This option will Zoom into the audio tracks.
|
GPI or Keyboard
|
|
MultiTrack.ZoomOut
|
|
This option will Zoom out the audio tracks.
|
GPI or Keyboard
|
|
Zetta.EditAudioIn.ZettaEditor
|
|
Opens the selected asset in the Zetta Single Track Editor
|
GPI, Cue Point or Keyboard
|
|
Zetta.EditAudioIn.ZettaMultitrackEditor
|
|
This option will open the selected asset in the Multitrack Editor allowing the user to edit the audio.
|
GPI or Keyboard
|
|
Zetta.Open.MultitrackEditor
|
Station, option to Start recording immediately and Track Count.
|
Opens the Multitrack Editor Module for the selected station. If the option Start recording immediately is selected the Editor will start recording as soon as the module is open. The default track count is 3. Track count can be a minimum of 1 track for single track editing.
|
GPI or Keyboard
|
|
Transition between different Play Commands:
Invoking a Play command always transitions from the current Play Command to the requested one immediately. However, hitting the Play button (it will be in paused mode when play commands are in progress) switches to regular Play mode when invoked while PlayExcludeSelection, PlayOutsideSelection and PlayStutter commands are in progress and will play from that position till the mixer end. Similarly, invoking the PlayTogglePause and PlayToggleStop commands while the play commands PlayExcludeSelection, PlayOutsideSelection and PlayStutter commands are in progress will switch to the regular play mode and start playing from that position till the mixer end.
|


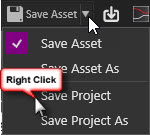
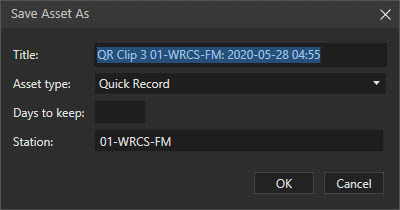
 button or the project was already saved as an asset. This option will mix down and save the changes to the asset, it will also open a save window to allow the user to name the project, select a location and specify whether the editor should save copies of the associated audio files.




 button can be used to revert the changes made in the VST plugin. The Commit
  button is used to commit the changes, close the VST Plugin and return to the Zetta Editor. If there is a region selected the changes are committed to that region. If no section is selected in the track, Zetta will apply the changes to all sections on the track. If there are selected sections on the track, Zetta will only apply the changes to those sections.