Welcome < Layouts Overview < Docking Modules
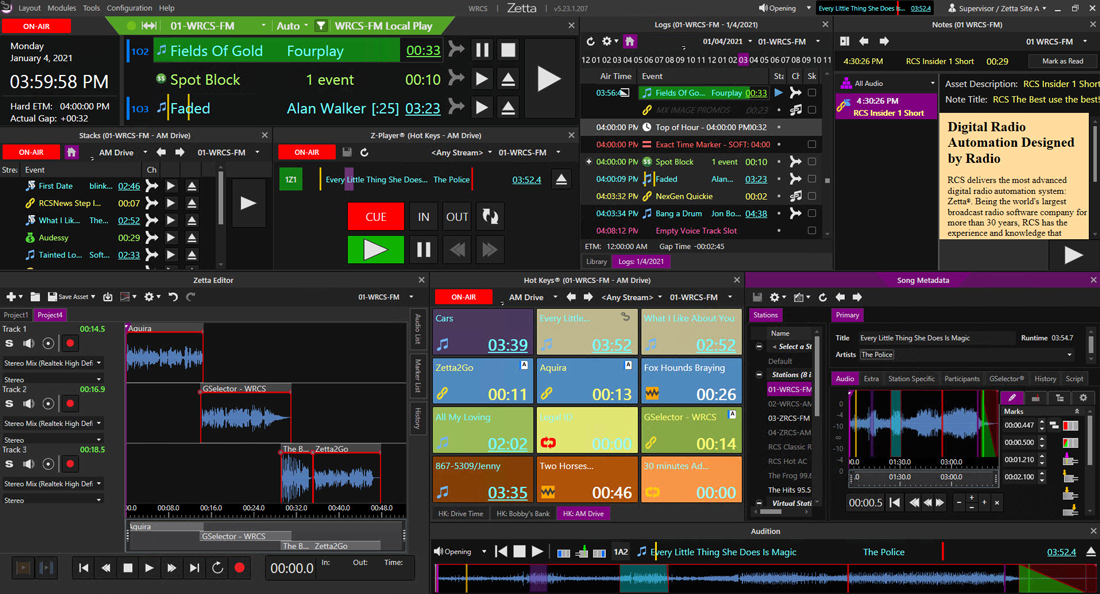
Modules, Tools and many of the windows can be docked in Zetta. The modules opened can be Docked, Undocked or Free Floating. Modules and Tools can be docked together in different windows or in the Zetta main application window, to arrange them in a convenient way, so that each user can completely customize their Zetta experience to their video display preferences. One of the uniquely powerful tools in Zetta is the ability to take full advantage of a computer's capabilities allowing the user to utilize the higher resolutions and easily view 6 to 8 modules docked on the screen. To save space on the desktop, the Modules and Tools can also be docked as a tab of another module, this is useful especially when the user wants a module/tool to be easily accessible, but not necessarily consuming real estate on the desktop.
The following docking guides will appear when clicking and dragging the title bar or tab of a module or window to assist in the docking and undocking:
|
|
Dock on Current – The Dock on Current icons appear when the module or tool window is moved over an existing tab or module/tool. Dropping on the top |
 Dock on Top – The Dock on Top option appears at the top of the docking area. Dropping the module/tool on this option will dock the window along the top edge of the docking area.
 Dock on Left – The Dock on Left icon is located to the left side of the docking area. Dropping the module/tool on the Dock on Left icon will dock the window along the left edge of the docking area
 Dock on Bottom – The Dock on Bottom icon appears at the bottom of the docking area. Dropping the module/tool on this icon will dock the window along the entire bottom edge of the docking area.
 Dock on Right – The Dock on Right icon appears at the right of the docking area. Dropping the module/tool on this icon will dock the tab along the right edge of the docking area.
Tip: To temporarily disable the docking behavior, just hold the CTRL key while dragging modules around in a layout, and Zetta will not show the docking highlight regions until the key CTRL key is released. Once you're happy with the layout it can be saved using the Layout menu. Optionally, the Layout can also be Locked to prevent accidental changes.
In this Topic: show/hideshow/hide
|
|
To dock Modules in a Layout, use the following steps: |


 , by hovering the mouse over the edge of the module until the double arrow is visible.
|
|
To dock Tools or Modules in a tabbed configuration, use the following steps: |


Zetta allows each user to arrange a Metadata card layout in the manner that optimizes the use of the Card based on the user's preference. Each tab can be docked in a different location to arrange the tabs in the most convenient way so each user can completely customize their Zetta® experience to their video display preferences. The docking of the metadata card is saved when the main layout is saved from the Layout menu.
|
|
To dock and undock the tabs, follow these steps. |

|
|
To dock the windows in the logs module, use the following steps: |


|
|
To Pin or unpin panes, use the following steps: |
 menu are shown in the side panel.


Welcome < Layouts Overview < Docking Modules
© 2007-2024 RCS. All Rights Reserved.

 icon will add it as a tab to the same position as the existing tabs or module/tool. Dropping the module/tool on the bottom