Welcome < Configuration < Stations Overview
Stations Overview
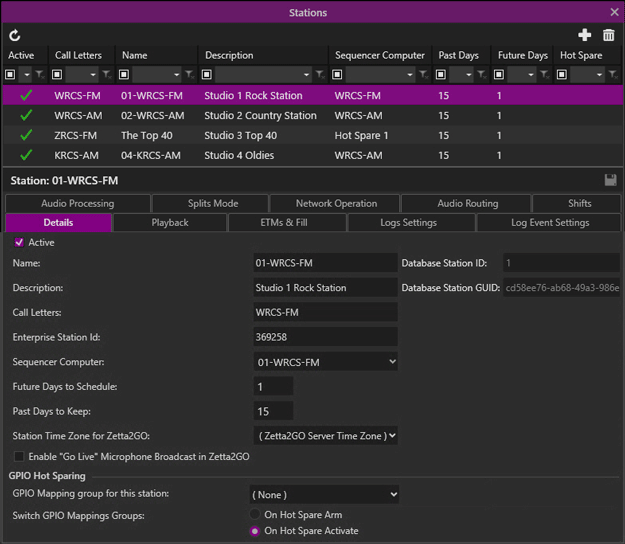
The Station configuration in Zetta® is used to add and customize stations. Each station can be customized by what computer runs the station, the players that the station uses and the way that overfilled and under-filled hours will be handled during on-air play. The top portion of the window shows a list of created stations with a toolbar to Add and Delete stations. The bottom portion of this window shows the selected station's station number and has tabs that are used to configure the station.
Station Tabs: show/hideshow/hide
Click any area in this image for help
Click any area in this image for help
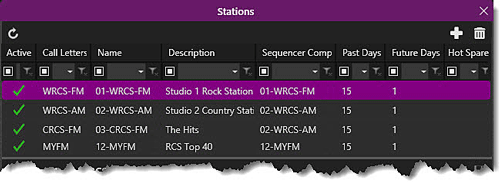
Station List
The top frame of the Stations configuration window shows a list of stations added. The columns can be reorganized to fit the user’s needs and Custom Filtering can be used to filter the contents of the pane. Optionally, use the column to search for a Station.
The following functions are available for adding and deleting a station:
Refresh Stations
The Refresh Stations  button will refresh the window to the last saved state, discarding any unsaved changes.
Add New Station
The Add New  button is used to create new stations.
Delete Selected Station
The Delete Selected Station  button will remove the selected station from Zetta.
Create a Station
|

|
To create a new station, perform the following steps:
|
- In the Configuration Menu, click Stations.
- Click the Add New button.
- Select Station Active (Required for On-Air play).
- In the Details tab enter the Name to identify the station.
- Enter a Description to describe the station (optional).
- Enter the station Call Letters. This will used in Publish and Live Metadata output.
- Enter an Enterprise Station ID. This is used with external Traffic applications and may not be required for the station. This field can also be exported using Live Metadata feature.
- Select a Sequencer Computer from the drop-down that will control the station log.
- Optionally, change the number of Future Days to Schedule logs for the station. Schedule Days must be selected in the Scheduled Maintenance tab of the System Configuration window.
- Optionally, change the number of Past Days to Keep logs for the station. Purge Old Logs must be selected in the Scheduled Maintenance tab of the System Configuration window.
- Select the Station Time Zone for Zetta2GO.
- Optionally, select the Enable "Go Live" Microphone Broadcast in Zetta2GO. This will allow the users to see the Go Live button in the On-Air module of Zetta2GO. The user must have the Zetta2GO Open Mic security right to use the "Go Live" feature in Zetta2GO.
- Optionally, select the GPIO Hot Sparing settings.
- Select the Playback tab.
- Select the Stream Group from the drop-down for Sequencer Stream Group. This is audio played On-Air; see the Stream Groups Configuration section of this guide for more information on adding and configuring Stream Groups.
- Select the Hot Keys Stream Group from the drop-down for the Hot Keys® Module; see the Stream Groups Configuration section of this guide for more information on adding and configuring Stream Groups.
- Select the Stack Stream Group from the drop-down for the Stacks Module; see the Stream Groups Configuration section of this guide for more information on adding and configuring Stream Groups.
- Select the Z-Player Stream Group from the drop-down for the Z-Player Module; see the Stream Groups Configuration section of this guide for more information on adding and configuring Stream Groups.
- Select the Stream Assignment Method.
- Optionally, select Ignore station asset activation.
- Optionally, select Audio needs approval before airing.
- Optionally, select the Auto Fade Songs at Segue
- Set the Fade-Out Duration in seconds
- Set the Hook Fade-In value in seconds as desired
- Set the Hook Fade-Out value in seconds as desired
- Select the modules to Apply Fade-Out Value on Stop
- Set the Pitch Songs By percentage
- Set the Maximum Stretch and Squeeze to use for Spot Blocks
- Set the Requeue event if stopped and has played less than in percent or seconds of audio played before stopped.
- Select the desired options for Live Event Handling
- Set the Bed Validation to have Zetta validate the bed for play. See also Bed Validation in the Playback tab of the Station Configuration.
- Select the ETMs & Fill tab to select the desired ETMs & Fill options.
- Select the Logs Settings tab select the desired Logs Settings.
- Select the Log Event Settings tab select the desired Log Event Settings.
- Select the Audio Processing tab to select the preferred Normalization options.
- Set the Song Ducking levels to use with each type of asset.
- Set the Voice Track settings for the station.
- Select the Shifts tab
- Click the Add Shift button to add a new Shift.
- Select the Network Operation tab to configure the GPIs and GPOs for use in Network mode and Capturing Station Output and GPI triggers.
- Select the Audio Routing tab to configure the Routes for the station
- Click the Save
 button to save the station settings.
See the Splits Mode topic of this section for information on station splits configuration or see the Zetta Splits Feature topic.
Welcome < Configuration < Stations Overview
© 2007-2024 RCS All Rights Reserved.