 button in the Logs Module.
Welcome < Configuration < System Configuration < Publish
The Publish tab in the System Configuration window is used to create, edit or delete Publish types that are used to Publish a group of mixed content such as an Episode or Podcast to a configured Location. The configurations in this tab are used with the Publish  button in the Logs Module.
Click any area in this image for help

Click any area in this image for help
In this Topic: show/hideshow/hide
Output Audio/Output Audio Conditional
Normalization targets for Show/Mini-Logs Publish from Library
Publish tab Step-by-Step Topics
Add a Publish Type to Output only Metadata
Add a Publish Type to Output only Audio
Add a Publish Type to Output Audio and Metadata
Add a Publish Type to Output Metadata with Conditional Audio
The following options are available using the Publish Toolbar.
|
|
Copy Publish Type - The Copy Publish Type will copy an existing selected Publish type. |
|
|
Add New Publish Type - The Add New Publish Type is used to create a new Publish type. |
|
|
Delete Publish Type - The Delete Publish Type will delete the selected Publish type from the Zetta database. |
The Active option activates the Publish type. Multiple Publish configurations can be created in this tab.
Use the Name field to give the Publish type a name. This name will be used in the filename for the files created when the content is Published so use something that is descriptive to allow for easy recognition.
The Description field is optional and is used to describe the Publish type.
The Max Length is the maximum total length of the published content. This field is optional. A value of 00:00:00 means there is no maximum and any length of content can be published. If the selected content to be published exceeds the Max Length the user will receive a warning and the content will not be published.

The Output Metadata XML is used to output the metadata in XML format to a configured Location. When Output Metadata XML is enabled the following fields in the Metadata section are available for configuration.
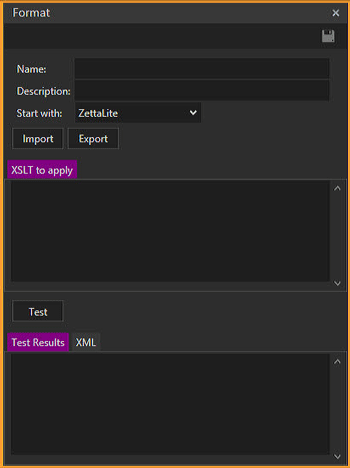
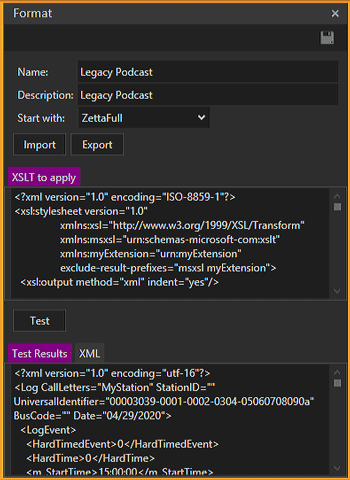
Transform Metadata XML - The Transform Metadata XML drop-down allows the user to select a predefined XSLT to use to transform the output metadata. The user can select one of the predefined XSLT (Extensible Stylesheet Language Transformations) options or create a new XSLT format to use. There are five XSLT formats that ship with Zetta three of which can be edited to fit the needs of the Published metadata. The existing formats are as follows:
Include event Notes - This option is used to include GSelector event Notes. Zetta must be integrated with GSelector.
Include event Scripts - This option is used to include Scripts from the Metadata card of the asset.
Output Folder - The drop-down for the Output Folder lists all the predefined Locations configured using the Locations tab of the System Configuration window. This is where Zetta will place the Published Metadata. The computer that is doing the Publishing from the Logs module must have access to this location.
Launch Exe - The Launch Exe field is used to define a third party application that will pick up the metadata from the defined Output Folder. This field is typically used with the Output Audio Conditional option. The executable will place the Conditional file in the selected Location when its task is complete, at which point Zetta will Output the Audio. Variables that can be used in this field are:
@err - Create and Error log file.
@mf - Resolves the path to the metadata. For example: c:\Windows\Notepad.exe @mf will open the XML in Notepad if the Output Folder were on the local computer.
|
Important Note! |
Placing @err in the Launch Exe field will output an .err log file for any exception or error found during the execution of the Publish. This file is output to the C:\ProgramData\RCS\Zetta\!Temp directory. If @err is not placed in this field the log file will not be written. Contact RCS Support for assistance. |
Capture Metadata Output - The Capture Metadata Output when selected, will log each XSLT transformation for publish to a separate PUBLISH_COMMUNICATION log file to the C:\programdata\rcs\zetta\!logging\debug folder. Use this option to troubleshoot any issues with Publish configurations.
The Output Audio/Output Audio Conditional enables the Audio options to Output Audio to a configured output folder or to Output Audio based on a Condition that is met. When Output Audio Conditional is selected a Location drop-down is displayed allowing the user to select the configured location.
Location - This field is available when the Output Audio Conditional option is selected. Zetta will wait for the Conditional file to be available in this selected location before it Outputs the Audio to the Output Folder defined in this section. The Location selected here is configured in the System Configuration Locations tab.
Computers - The Computer selected here is the computer that will Publish the Audio to the selected Output Folder. Multiple computers can be selected; this is useful for redundancy and load balancing. The computers here must have access to the Location selected above.
Output Folder - The drop-down for the Output Folder lists all the predefined Locations configured using the Locations tab of the System Configuration window. This is where Zetta will place the Published Audio.
Launch Exe - The Launch Exe field is used to define a third party application that will pick up the Audio. Variables that can be used in this field are:
@err - Create and Error log file.
@mf - Resolves the path to the metadata. For example: C:\Windows\Notepad.exe @mf will open the XML in Notepad if the Output Folder were on the local computer.
@af - Resolves the path of the audio file. For example: C:\Windows\System32\cmd.exe "/c C:/ZettaShare/Publish/Publish.bat @af"
* Forward slashes are required to execute a batch file. Quotes may or may not be needed.
|
Important Note! |
Placing @err in the Launch Exe field will output an .err log file for any exception or error found during the execution of the Publish. This file is output to the C:\ProgramData\RCS\Zetta\!Temp directory. If @err is not placed in this field the log file will not be written. Contact RCS Support for assistance. |
The Normalization targets for Show/Mini-Logs Publish from Library option tells Zetta to use the selected stations normalization and ducking values, from the Audio Processing tab of the Station Configuration, when publishing a show/mini-log from the Library module. A Show or Mini-Log is a schedule of events similar to a Macro but lives outside the main station log. These events can be songs, spots, voice tracks, links, etc.
|
Important Note! |
When a Show/Mini-Log is placed in a stations log it uses that stations normalization and ducking values. |
The following task commands can be used for Publish. The first three do the equivalent of selecting events in a Log, Show, or Mini-Log and clicking the Publish button to write an audio file and/or metadata file containing those events to a location specified in this Publish tab.
|
Execute Command |
Parameters |
Description |
Comment |
|
Publish.ExportLogEvents |
Publish Task, Station, Start Day Offset, Start Time, End Day, End Time |
This option will Publish the specified Logs events for the selected station. The Publish task is defined in the Publish tab of the System Configuration window. The Start Offset Day is relative to the day the command is run. 0 = same day, -1 yesterday, +1 tomorrow etc. The End Day can be either the Same day or the Next day. The Start time is the time in the log where the export is to begin. The End Time is the time of the first event that is not to be exported. In other words, Zetta publish everything from the event at start time to the event prior to the event at end time. |
The Station selected can be the <Current Station>" for an Execute Command. If the Start Time is not the time of an ETM or TOH, then it'll be the asset that is playing at that time. If the start time is left blank, Zetta will start with the first event in start day. If End time is blank, Zetta will publish up to and including the last event in the day. |
|
Publish.ExportMiniLogEvents |
Publish Task, Mini-Log, Start Time, End Time |
This option will Publish the specified Mini-Log events. The Publish task is defined in the Publish tab of the System Configuration window. The Start time is the time in the selected Mini-Log where the export is to begin. The End Time is the time of the last event in the Mini-Log that is to be exported for the publish task. |
If the Start Time is not the time of an ETM, then it'll be the asset that is playing at that time. If the start time is left blank, Zetta will start with the first event in the Mini-Log. If End time is blank, Zetta will publish up to and including the last event in the Mini-Log. |
|
Publish.ExportShowEvents |
Publish Task, Show, Start Time, End Time |
This option will Publish the specified Show events. The Publish task is defined in the Publish tab of the System Configuration window. The Start time is the time in the selected Show where the export is to begin. The End Time is the time of the last event in the Show that is to be exported for the publish task. |
If the Start Time is not the time of an ETM, then it'll be the asset that is playing at that time. If the start time is left blank, Zetta will start with the first event in the Show. If End time is blank, Zetta will publish up to and including the last event in the Show. |
|
Zetta.Open.PublishControl |
<None> |
This tasks opens the Publish window. |
|
This section will provide step-by-step instructions for tasks in the Publish tab of the System Configuration window.
In this section: show/hide show/hide
Add a Publish Type to Output only Metadata
Add a Publish Type to Output only Audio
Add a Publish Type to Output Audio and Metadata
Add a Publish Type to Output Metadata with Conditional Audio
|
|
To add a Publish Type to Output only Metadata, perform the following steps: |
 button.
 to save the settings.
|
|
To add a Publish Type to Output only Audio, perform the following steps: |
 button.
 to save the settings.
|
|
To add a Publish Type to Output Audio and Metadata, perform the following steps: |
 button.
 to save the settings.
The following instructions use a test application as an example only for the Launch Exe this application is not supplied by RCS or Supported.
|
|
To add a Publish Type to Output Metadata with Conditional Audio, perform the following steps: |
 button.
 to save the settings.
|
|
To create a XSLT Format, perform the following steps: |
 button
 button.
 button when finished.
|
|
To edit a XSLT Format, perform the following steps: |
 button
 button
 button when finished.
Welcome < Configuration < System Configuration < Publish
© 2007-2024 RCS All Rights Reserved.