Welcome < Modules < Library Module < Audio Utility
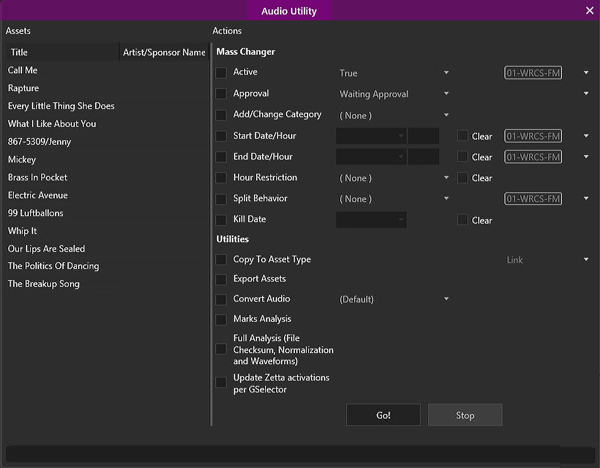
The Audio Utility allows the user to change or analyze multiple assets in Zetta. Using the Launch Audio Utility ![]() button from the Library toolbar the user can open the Audio Utility window. The left side of this window shows a list of the assets that were selected in the Library module. The right side of this window shows the Actions that can be taken for the selected assets. The Actions in this window will vary based on the asset type, asset scope and GSelector Integration.
button from the Library toolbar the user can open the Audio Utility window. The left side of this window shows a list of the assets that were selected in the Library module. The right side of this window shows the Actions that can be taken for the selected assets. The Actions in this window will vary based on the asset type, asset scope and GSelector Integration.
Click any area in this image for help
Click any area in this image for help
In this Topic: show/hide show/hide
Audio Utility Step-by-Step Topics
Change Asset Type for Multiple Assets
Copy to Asset Type for Multiple Assets
Set the Start and End Date for Multiple Assets
Active - The Active utility allows the user to easily activate multiple songs at once for one station or all stations. See the Activate Multiple Audio Assets section of this guide for more information.
Approval - When the Audio needs approval before airing Station configuration option is checked this utility becomes available, this utility makes approving audio assets for On-air play quick and easy. This utility can also be used to change the status of an asset to Waiting for Approval or Disapproved. See the Approving Assets for On-Air Play section of this guide for more information.
Add/Change Category - The Category utility is available when selecting Songs, Link or custom Asset Types for a specific station. This utility allows the user to set or change the Category of these Assets.
Start Date/Hour – The Start Date/hour fields are used to specify when the assets will be available for play. Use the calendar control to select a date then adjust the time as needed. Use the Clear Date checkbox to remove the Start Date/Hour values from the selected assets.

End Date/Hour – The End Date/Hour fields are used to specify when the assets will no longer be available for play. Use the calendar control to select a date then adjust the time as needed. Use the Clear Date checkbox to remove the End Date/Hour values from the selected assets.
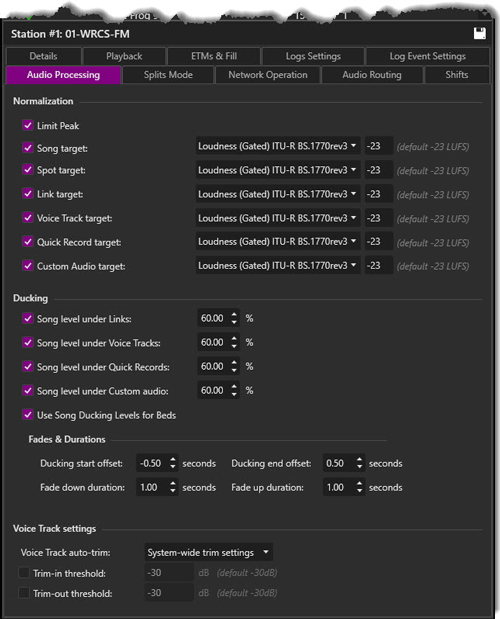
Hour Restriction - The Hour Restriction option can be used to assign an Hour Restriction Grid to the selected assets for the current station. This option is only available if a station is selected in the Library Module.
Split Behavior - The Split Behavior option is available when the Splits feature is enabled in the System Configuration | General tab. Use the Split Behavior drop-down to select the desired behavior when the Asset is scheduled in the Log.
Kill Date - The Kill Date is the date to stop scheduling the asset and automatically delete it from the Library. Use the Clear Date checkbox to remove the Kill Date value from the selected assets.
Assign to Station Group - This option is available when assets with a Cuts metadata Scope are selected. This option is used to assign a defined Station Group to multiple assets.
|
Important Note! |
If All Stations is selected as the Station Group, any new station created will be able to play any active cuts where all stations is assigned as the Station Group. By default new stations are automatically added to the All Station Station Group. |
Assign To Station - This option is available when assets with a Cuts metadata Scope are selected. This option is used to assign a station to multiple assets.
Change Asset Type - The Change Asset Type option is used to Move or Copy assets from one asset type to another. This utility is usefully when changing multiple assets to a different asset type. This option is only available for those assets that are NOT integrated with GSelector. When the selected assets are integrated with GSelector this option is changed to Copy to Asset Type.
Copy To Asset Type - This option is visible if the selected assets are integrated with GSelector (Song and Links). This option is used to Copy the selected assets to another asset type.
Export Asset - The Export Assets utility allows the user to easily export the selected assets to a connected drive. This can be used for backing up the assets or exporting a spot for a customer. Use the Export | File Drop setting in the Audio Format tab in the System configuration to set the format the audio to be exported. Once the user clicks the Go! button the user will be prompted for a location to export the audio assets. Each file that is exported will include the Cart Chunk (trim in/out; intro1,2,3; Segue; Hook In/Out) data for the audio.
Convert Audio - The user can convert any audio asset in Zetta to the configured Audio Format desired using the Convert Audio option in the Audio Utility. Convert Audio uses AFC to convert the audio.
Marks Analysis – The user can choose a single piece of audio or multiple pieces of audio to analyze the audio based on the Marks Analysis Settings configured in Configuration | System | Audio Processing tab.
Full Analysis –The Full Analysis runs through the selected file(s) to determine the gain values for all the supported algorithms in Zetta. Zetta then saves these values to the database to use based on the normalization selected for each station in Configuration | Station | Audio Processing | Normalization Settings. This option is also used to create a unique File Checksum hash value and Waveforms for each file selected, the File Checksum value is used when comparing like files received from a ZCast transfer or import into the system.
Update Zetta Activations per GSelector - The user can choose a single piece of audio or multiple pieces of audio to updated Zetta per GSelector.
The Audio Utility allows the user to analyze, normalize and/or Convert existing audio in Zetta.
In this section: show/hideshow/hide
Update Zetta activations per GSelector
Set Song Station Category / Set Link Station Category
Set the Start and End Date for Multiple Assets
|
|
The following steps will show how to use the Marks Analysis in the Audio Utility in the Library Module: |
 button.
|
|
The following steps will show how to use the Full Analysis option of the Audio Utility in the Library Module: |
 button to save the station settings.
Zetta has the ability to convert audio files to another format using AFC. After creating the desired Audio Format in Configuration | System | Audio Format, use the Audio Utility | Convert Audio option to convert the asset audio to the desired format.
|
|
The following steps will show how to use the Convert Audio option of the Audio Utility in the Library Module: |
 button
button
The Change Asset Type is only available for systems and assets that are not integrated with GSelector.
|
|
The following steps will show how to Change an Asset type to another asset type using the Audio Utility in the Library Module: |
button
The Copy to Asset Type option is available for systems and assets that are integrated with GSelector.
|
|
The following steps will show how to Copy Assets to another asset type using the Audio Utility when integrated with GSelector: |
button
|
|
The following steps will show how to Export Assets from Zetta using the Audio Utility in the Library Module: |
button
|
|
The following steps will show how to set the Start and End date of an asset using the Audio Utility in the Library Module: |
button
|
|
The following steps will show how to set the Kill Date of an asset using the Audio Utility in the Library Module: |
|
|
The following steps will show how to set the Split Behavior of an asset using the Audio Utility in the Library Module: |
© 2007-2024 RCS All Rights Reserved.

