Zetta Cloud Disaster Recovery
With this unique Zetta feature, a station’s content is automatically uploaded to the cloud, ready at a moment’s notice for playback. From natural disasters to viruses taking down IT infrastructure, whatever the emergency, Zetta Cloud is a high-tech, cutting-edge safety net that gets broadcasters back on-air, easily, efficiently and quickly.
In minutes, not days, Zetta’s cloud-based Disaster Recovery tools will seamlessly backup all audio, schedules and metadata. When the station is ready to return to its normal live output, Zetta Cloud rapidly restores all of the original data.
In this topic: show/hideshow/hide
Zetta Cloud Account
A Zetta Cloud Account is required for the configuration of Zetta Cloud Site Replication and Zetta Cloud Backup restore. Content RCS Sales for a Zetta Cloud License.
Setup Zetta Cloud Site Replication
Site Replication must be configured with a Zetta Cloud Site to create the link between Zetta and Zetta Cloud. When the connection is made a Zetta Cloud Store is also created. Use the Zetta Cloud Store to configure the Media and Backup Store settings.
In this section: show/hideshow/hide
Setup a Station Group for Site Replication
A Station Group will need to be setup with the Stations that will be included in the Site Replication. This will be used in the Replication Profile tab of the Zetta Cloud Site in the Site Replication Manager for replicating Assets and Station information.
|

|
To create a Station Group, perform the following steps:
|
- Select Station Groups from the Configuration Menu
- Click the Add Station Group
 button
- Type in a Name
- Type in a Description of the Station Group.
- Select the Stations for the Station Group.

- Click Save
 to save the Station Group.
- Close the Station Groups window.
Setup a Zetta Cloud Site in Site Replication Manager
|
|
To setup a Zetta Cloud Site in Site Replication Manager, perform the following steps:
|
- Go to System in the Configuration menu.

- Select the Active checkbox for each of the Site Replication Services.
- Select Active for the Zetta2GO Service.
- Select the Computer that will run the Site Replication Services and Zetta2GO Service.
- Click Save .
- Close the System Configuration window.
- Go to Site Replication Manager in the Configuration menu.
- Select the Station Group previously created for each of the Replication settings. For more information on these settings so the Site Replication Manager topic.
- Select Add Zetta Cloud Site from the Add
 toolbar button.
- Enter a Zetta Cloud Username
- Enter the Password for the entered Username.
- Click OK. The Replication manager will contact, the Zetta Cloud Site, verify the credentials and look up the corresponding Organization in Zetta Cloud and add it to the Site list on the left of the Site Replication Manager. (NOTE: Nothing has been saved.)
- The Replication Profile tab is used to configure what content the stations in Zetta Cloud are subscribing to (Assets & Audio synchronization; Logs and Voice Tracking; Live Log changes). Adjust as needed. If not sure what to enter, select [All Stations] for all fields in this tab.
- Select the Station Group(s) for Synchronize audio files for Asset active on. Use the drop-down to select the Station Group(s).
- Select the Station Group(s) for Participate in Log import (GSelector, Flat File, Zetta API), Voice Tracking and allow manual Clock and Log distribution. Use the drop-down to select the Station Group(s).
- To allow automatic updates for Logs and Clocks changes select an Station Group for Participate in Log import and all live Log / live Clock changes.

- Select the Bandwidth Control tab.
- Set the Limit Total Outbound Bandwidth.
- Set the Limit Total Inbound Bandwidth.
- Click the Publish site configuration button.
- Click OK to close the Replication Configuration Published window.
- Close the Site Replication Manager window.
- Restart the Replication Services in the Startup Manager.
Configuring a Zetta Cloud Store
|
|
To configure a Zetta Cloud Store in the Content Stores of Zetta, perform the following steps:
|
- Go to Configuration Menu, click Content Stores
- Select the newly created Zetta Cloud Store.
- Edit the Name for the Content Store.
- Optionally, enter a Description for the Content Store.
- Select the computer that will manage the store from the Managed By drop-down list.
- Select Use for audio files in the Media Store section. When this is selected for the Zetta Cloud Store audio files will be synced to the Zetta Cloud. This allows for missing or corrupt audio files to be automatically recovered from the Zetta Cloud Store.
- Select Use as playout source. When this is selected for the Zetta Cloud Store, if an audio asset is missing from the local stores, Zetta can stream the audio directly from the Zetta Cloud Store.
- Select Use for database backups in the Backup Store section
- Optionally, select the Purge backup files from the Recycle Bin option. Then select the setting for when Zetta should purge the backup files.
- Immediately
- Backups older than x days
- When total backups size exceeds x GB
- Keep Last x backups
- Click Save to save changes.
- Access the Startup Manager window by double-clicking on the
 icon in the System Tray:
- Click the Stop All button for each service.
- Once all the services have stopped, click the Start All button for each service.
- Ensure all the Content Management Services start.
|

Important Note!
|
If Zetta is configured and Assets already exist in the Library, contact RCS Support to have the existing stations and files synced to Zetta Cloud.
|
Create a Backup of the Zetta Database
|
|
To back up a Zetta database perform the following steps:
|
- Select the Tools menu.
- Click Backup Database
- Name the Backup

- Click the Backup button
- When the Backup database has completed successfully, click the ‘X’ to close the window.
- From this point on every time the Scheduled Maintenance creates a backup, a backup will be created in the Zetta Cloud Store.
Zetta Cloud Disaster Recovery Steps
A Zetta Cloud Recovery can be used when no other backup is available, such as a disaster requiring a complete reinstall of Windows, SQL and Zetta. For ease of restore of the database, the Database and License Manager computers should be named the same as they were previously.
|
|
To restore Zetta from a disaster, perform the following steps:
|
- Install the Zetta database.
- Install Zetta.
- Run any Updates needed for the version installed.
- Log in to Zetta using the Supervisor account (no password is required).
- Click the Arrow
 or press Enter to login

- With the first login into the database, the user will be prompted to create a computer account. Click Next to continue

- Enter the Computer Name or leave the default localhost name.
- Enter a Description of the computer (optional).
- Click Next to continue

- When the computer is created click Finished this will open the Main Zetta application window and show (ZETTA NOT LICENSED) in the upper left corner.
- Go to System in the Configuration menu.

- Select a computer for Database Watcher Service and Scheduled Maintenance
- Click Save.
- Next License Zetta.
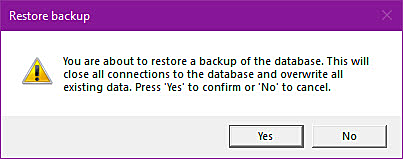
- Go to Restore Database in the Configuration menu.
- Select the Zetta Cloud Backups tab.
- Type in a Zetta Cloud Username and Password.
- Click OK.
- Select the backup to restore.
- Click the Restore button.
- The backup file will be copied from the Zetta Cloud Backup Store to the local computer.

- Optionally, deselect the Backup database to OOPS.
- Click the Restore button. With the Backup Database to OOPS checked, Zetta will first take a backup of the current state of the database before restoring the selected backup.

- Click OK when the backup is fully restored.
- After the database restoration is fully complete, Zetta needs to be restarted by the user.
- Please restart Zetta. If a different version of Zetta was installed, run any updates that are needed by the new version.
- Log in to Zetta.
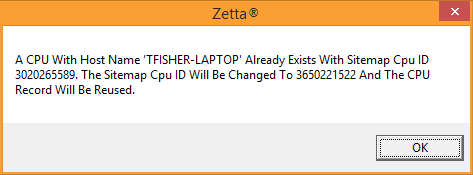
- The CPU will match on the Host Name. Zetta will update the CPU ID in the database and reuse the CPU Record. Click OK to continue.
- Zetta and the Startup Manager will need to be restarted on the License Manager computer. Once the database is restored, if needed, the audio files will begin being restored from Zetta Cloud to the local Content Stores.
© 2007-2024 RCS All Rights Reserved.